Showing posts with label fabric. Show all posts

Wednesday, August 13, 2014

Pink Quilt

 I fell in love with this pattern, you can read about it here. I decided to blow it up 100% and this is how the court house step quilt pattern looks like on a larger scale. Nice, huh?

I bought a kona cotton jelly roll, and used 4 of their pinks, I was looking for an ombré look. I think I did achieve it. For the backing I used a beautiful multicolor print from Timless treasures fabrics.

I am also very excited to share that I am getting so much better at this free motion quilting stuff! I had a lot of fun quilting it with minimal frustration, and an acceptable outcome.


I have been holding back on posting it because I was waiting to get good pictures. I just like it so much. It will be hard to see it go. I know some cute little girl will be loving this pretty soon! and that helps. 

Photos by: Lady Di (Diana Curiel)

Friday, July 18, 2014

Yoga Mat Sling

We recently moved to a new area and a yoga studio is just down the street within walking distance. I decided to make a yoga mat sling, all I need is a simple way to carry my mat.

I made it using my big pile of scrap and Kaufman's Essex Yarn Dyed Linen Blend Black.

I made an extremely long strip, 77" long


Leaving a 2" hole.

Pass one end through the other.
pull all the way through.
Pass that previous loop through the other end.
Pull all the way through.

Finished!
Ready for use! 


Thursday, July 17, 2014

A bag for Kristal


I was looking to make the BEST bag for when I start my college program next month! I really love the Pritemps fabric collection from 3 sisters, and after falling in love with the fabric combination of my yoga mat sling I went ahead and used the left over scraps. Oops spoiler alert, I haven't made that post yet...coming soon.

 A few months ago I bought Sara Lawson's book, " Big City Bags". I have made a total of three bags from that book. 1. Lucky Denver Mint Bag owner can't be revealed yet , 2.Fireside Bowl Bag ,  for my mom's good friend., and 3. Piccadilly Circus Handbag for my good friend Marcia, a lover of handmade and handbags.

This is bag is the fourth one I've made from this book...and every single one I make I love even more!

Organized!
I made the side panels using "the crazy 9 patch squares", a pattern given to me at the San Diego quilt run, you can read all about it here.


This is my back to school bag, but I finished it the night before a trip, I was so excited about how beautiful it turned out I just had to bring it with me. Also, it was a great opportunity to take some great pictures of it in beautiful locations.


Fine! I've been sold. The beach is AWESOME. 


Wednesday, March 19, 2014

My top 3 top 3's of the San Diego Quilt Shop Run

It has been hard to find a creative and simple way to review and talk about all the wonderful things I experienced in this quilt shop run, There just is so much to say. I decided to keep it simple but not short. I  picked 3 things to talk about and made a list of my top three favorites of each of those.


Top 3 Quilt Shops


COZY QUILT SHOP
2940 Jamacha Rd, El Cajon, CA 92019
This is the quilt shop closest to me and the one I shop at. I really like their fabric selection and after touring around all the others, I came to the conclusion it is still my favorite. Maybe because I am used to it, but I find what I am looking for faster. I like the way it is organized, not only by color but by designer or line.


FAT QUARTER QUILT SHOP
728 Civic Center Dr, Vista, CA 92084
This was the last one I visited and if it weren't because its too far away from me I would live there. The place is a house converted into a quilt shop. It is heaven on earth, a quilters fantasy! The entire house is covered with bolts and bolts of fabric. Fabric on the floor, on the walls, on the steps, on shelves, wherever they can find a spot. A wonderful fabric selection! They just have everything and anything. The owner is very sweet and lovely, I really liked the fact that she was there the day I visited.


THE COUNTRY LOFT
4685 Date Ave, La Mesa, CA 91941
Now this place is serious business. It is the cutest shop in town with the cutest and sweetest employees. The place is a little house, very small and very lovely. It is arranged and decorated with vintage style furniture and their products and merchandise are stored and displayed on them. Even the kitchen and bathroom are displaying either sample quilts or holding supplies. Their fabrics match the vintage idea, I just had to buy something. Just lovely. It also has a little cottage in the backyard where they sell antiques.


Top 3 Patterns


From the free patterns I received from this event, these were my three favorite. I feel these do really offer the teaching of new techniques whereas the others were providing more ideas than lessons. Don't get me wrong they are also lovely, but I am in a journey of learning.


Top 3 Fabrics


 Out of the 14 pieces of fabulous fabric I received, these three were my favorite. It needs to be known that it is hard to find nice, good solids. This black piece is as SOFT as can be. I love it!  The polka dot of the second  is so simple yet lovely. And the last one, well it just catches my attention every time I look that way.

    1. The Country Loft
    2. Cozy quilt shop
    3. The CraZy 9 Patch


Tuesday, March 11, 2014

2014 San Diego's Quilt Shop Hop


What a fun weekend I had! All the San Diego quilt shops throw this really fun event. The idea is that you have 10 days to go around San Diego and visit the 14 participating quilt shops. When I first heard about it I thought it would be neat to go check out places other than my local quilt shop. However I hesitated for a few days after I saw the map and how far apart some of these places are.


As the week went by I searched for it again and actually read the details. It just sounded better and better. At your first stop they will give you a passport in which you should collect a stamp from each quilt shop. Each shop gives away a 10" by 10" piece of fabric; this year's theme was black and white. You also get a free pattern of a quilt they created for this particular event. Nice! Right?! Little gifts and lots of learning. It got even better! There is a big prize. If you visit all 14 you can enter a raffle for a brand new Janome MC 6600 (worth $1,500!) I was sold! By then it was Thursday and I would only have 4 days, and believe me some of these places are FAR! Finally Friday morning arrived and I woke up convinced I would give it a try, at least check out the ones near by; this year I have the time. The experience sounds pleasant and you are also entered into other raffles for great prizes like shopping sprees or a basket full of fabric per quilt shop you visited. All you have to do is check out the shops and get your stamp, no purchase required, but c'mon who can help themselves? You are surrounded by beautiful high quality fabrics and you have coupons. Some of these places were just amazing. It felt like I had stepped into fabric heaven.


 I have a fabric addiction!


These runs have a theme and this year's was Sock Hop, which I came to learn was a reference to the informal high school dances of the 1950's hosted in a school's gymnasium for which shoes had to come off to prevent scratches and marks on the floors. Having a theme meant that at every shop you stopped by the decoration and feel of the place would be from the 1950's, even the sample pattern quilts were inspired by the theme. Many of the shops had fun music playing, people were dressed in poodle skirts, and they also had treats, drinks, and even ice-cream, which was a great thought since you are driving around so much.


Souvenirs

The above picture are all my shop souvenirs aside from the massive amounts of fabric I bought. It was a very fun experience. Every shop had its own personality, noticeable in their giveaways, their choice of fabrics they had for sale, their sample quilts and the people working there. I am very glad I gave myself the opportunity and took the time to do this. I am excited to do it again next year! 


Monday, February 10, 2014

How to make ruffles, gathers & pleats

These are the ways I've learned to do this.


Using a ruffler presser foot

make sure they fit in their positions properly


installed ruffler

This sewing machine attachment is not expensive and very easy to use. I bought this generic low shank ruffler at Joann's fabric store for about $10 with a 40% coupon. At the time, I was interested in making a ruffled apron, but couldn't figure out how to make them without this attachment. I enjoyed very much experimenting with it. 


You can see at the top it has a star and three different numbers. These are the three settings this ruffler has.
Set it at the star if you wish to sew in a straight line without having to change the presser foot. The 12, 6, 1 refers to how many ruffles per stitch. So, if positioned at 12 this means every 12 stitches it will create a ruffle, thus making ruffles 12 stitches apart. We have 6 stitches apart and 1 for every stitch. to select simply lift the plate and position the marker on whichever number you'd like.


Slide your piece of fabric following the arrow I drew.  The order should be, over, under, over and straight through. You might need to use tweezers or some pointy object to slide it in all the way through.

Now that you have mastered how to set your project through the ruffler, make sure you have the number of stitches per ruffles set and you may start sewing!

There are two ways you could do this. 
One, start by feeding the piece of fabric you want to sew your ruffles to at the bottom and independent from the ruffler. Then set the fabric that will become the ruflfes like shown on the picture below.


Now you may begin your sewing!

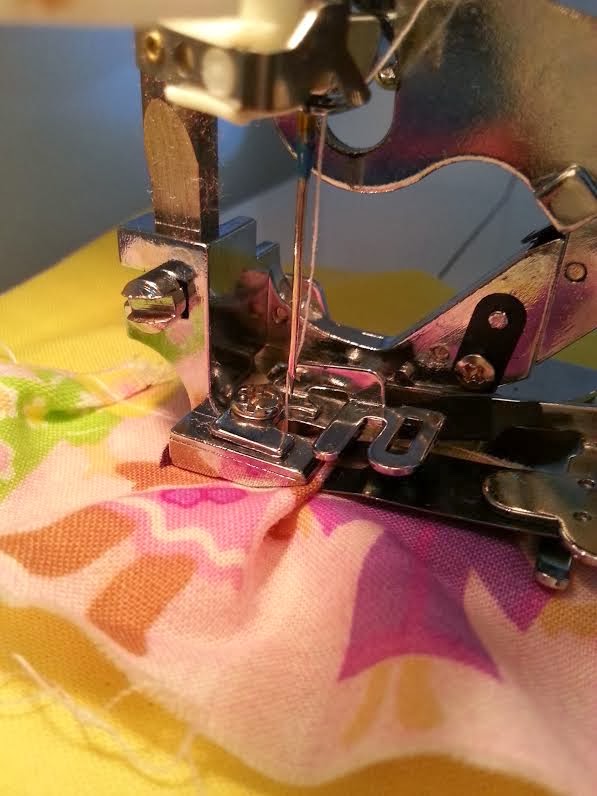
You can see here how the black plate is pushing the fabric in.


Now You can see how the ruffles look with the different setting. 


The above were done sewing the ruffles to the fabric at the same time. Now, let see how to do it separately.


First you sew your one strip of fabric into a ruffle of your desired length.


Then you pin it in place to the other fabric. and sew with 1/4" seam.


You are done! Your finished product should look like this.


So this is how I made my apron. I found this second method more useful for me, as I've mention I am still learning and once you figure a thing out a certain way you can break apart from the habits. It is hard for me to determine how much fabric I will need for each level. So, I sew a strip and then cut it to fit my need.


If you do not have access to a ruffler there are other easy and fun ways to make them.


Make pleats as you go 


I used an 8" square and a 4" by 22 " long piece of scrap for demonstration purposes.


Fold the strap into three sections and press with an iron. I fold it all the way until they overlap at least a 1/4". 


Start sewing and manually feed the ruffles. You can stop the footer presser, lift it, arrange the ruffle, and then stitch over it and repeat. This takes patience, but it is so fun and rewarding!


This is what I ended up with. I like to use a longer strap than needed for the ruffles, this way I am not limited on the amount of fabric I can feed through.


Trim the excess fabric off using either with a rotary cutter or with scissors. 

All done!

Another option is to sew along the sides, forming pleats.


Pulling thread to gather

Sew a line across the length of the fabric you wish to gather together with the longest setting your machine has. I used a 4. 

Leave a long thread and pull the bottom one with one hand and gather the fabric through with the other.


Gather the fabric until you get the ruffles you want or the size you need.


All done!