Showing posts with label quilt. Show all posts

Wednesday, August 13, 2014

Pink Quilt

 I fell in love with this pattern, you can read about it here. I decided to blow it up 100% and this is how the court house step quilt pattern looks like on a larger scale. Nice, huh?

I bought a kona cotton jelly roll, and used 4 of their pinks, I was looking for an ombré look. I think I did achieve it. For the backing I used a beautiful multicolor print from Timless treasures fabrics.

I am also very excited to share that I am getting so much better at this free motion quilting stuff! I had a lot of fun quilting it with minimal frustration, and an acceptable outcome.


I have been holding back on posting it because I was waiting to get good pictures. I just like it so much. It will be hard to see it go. I know some cute little girl will be loving this pretty soon! and that helps. 

Photos by: Lady Di (Diana Curiel)

Wednesday, July 23, 2014

Yoga mat bag

It has been a little over two years since the day Shannon and I hopped on a treadmill to test our ability to run a mile under 14 minutes, two weeks later we signed up and ran our first 5K, and so the journey into running began. I have since run three half marathons and am loving this new habit of mine.

Running then took me to yoga. I had tried yoga a few years ago and found it to be too challenging, I now think I went to a really advanced class back then, this time I fell in love with it. With everything I was learning at work and as a new runner I became conscious of the importance of stretching and breathing and yoga fulfilled that.

We recently moved to a new area and a yoga studio is just down the street. I decided to make a yoga mat sling, all I need is my mat, I am one block away. The problem is that yoga studio is not as affordable as my old gym, so I cannot go as often. I might have to travel farther and a bag would be more appropriate. I was so pleased with the way my sling turned out, I decided to finally make the yoga mat bag I had been planning for months.

I followed a free pattern from Amy Butler, you can find it here. I also followed 
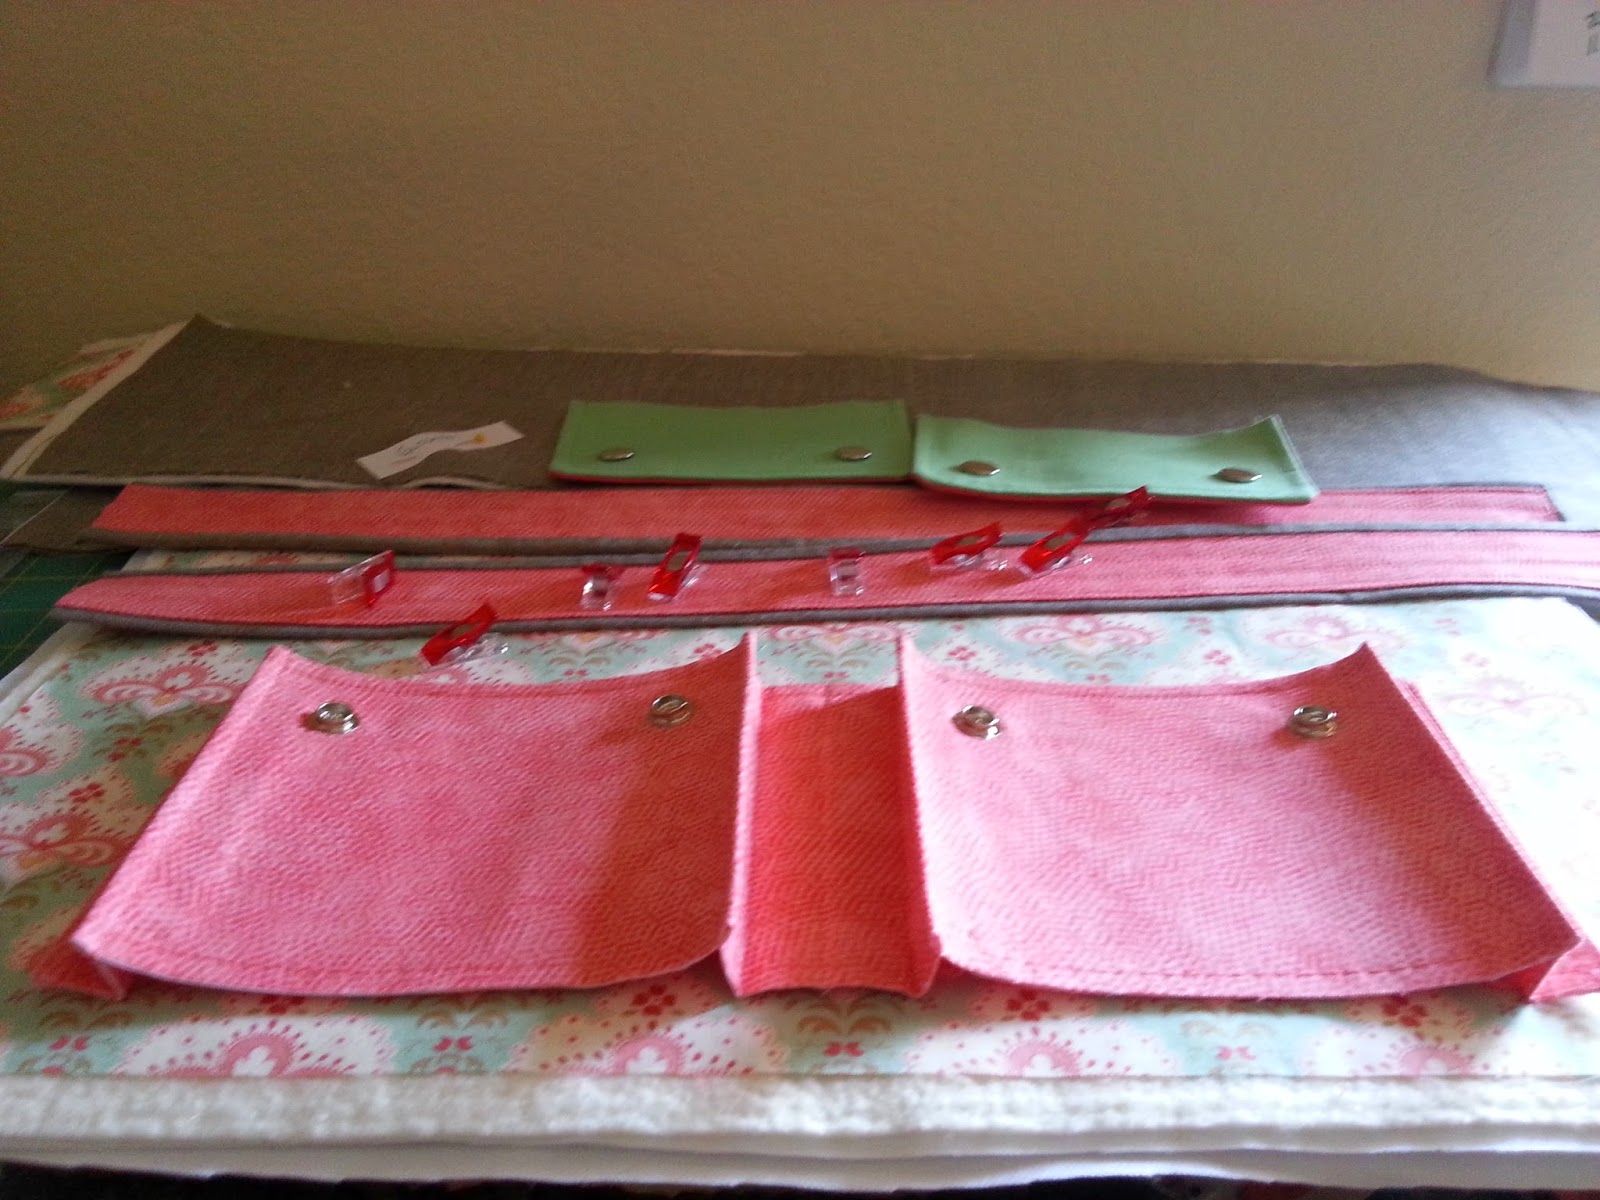
Jane's Girl Designs tutorial and made a few little changes along the way. I used a stiffer interfacing on the exterior fabric, I do not like the look of flimsy bags. I also do not like slip pockets, so I made an elastic pleated one instead.

Fabrics: 
  • Namaste Yoga Poses Oatmeal 1/2 yrd
  • Namaste Geo Light 1/2 yrd
  • Kaufman Essex Yarn Dyed Linen Blend Black 1 yrd


A HUGE thank you to my good friend Diana, aka LadyDi, for taking these awesome pictures, and for her patience and her time.


Tuesday, July 8, 2014

New Tool Tuesday

I bought this awesome new ruler for $1.95. This will be my entertainment on my upcoming long flight.


Wednesday, June 25, 2014

My Bag!

Yet another noodlehead's pattern, "The Cargo Duffle". I really love her style and her instructions. This pattern is FREE! you can get it at Robert Kauffman's website, and it is an easy pdf download. 

Fabric:
  • Printemps Lace Pond by 3 Sisters by Moda #44033-14
  • Dimple pimk fabric


cut, labeled, and color matched

pockets are ready!


elastic inside pockets

inside zipper pocket.


Thursday, June 19, 2014

Dog Leash for Lily

I mainly follow other quilters on instagram, michelle patterns in one of the many that inspire me. A few days ago she did a mini tutorial with pictures here. I loved the idea of using up scraps. I was meeting Shannon in a few days for breakfast, and decided to make this for her and her cute dog lily. 


I used the tutorial as a guide line, I am known to skip steps and never follow direction. I cut the scraps out into 5" wide and whatever the length of the scrap. I sewed it all together pressing all the seams to one side. **note: I should have pressed the seams open. Then, I ironed the interfacing, ironed the fold into 4 pieces and quilted along the strap starting with the open edge. then added the hook and sewed that corner. Lastly I folded the other end into a handle.

The leash is about 6 ft long.

testing


Monday, May 19, 2014

Mug Rug

Made this mug rug for Cara. I saw someone post a picture of a project with this star so I tried making it myself, without a patterns. I just sew and sew instinctively. It is a bit larger than the traditional mug rug, but I have come to find that with the smaller mug rugs you have to be very precise on where you place your mug. I made this one 9" by 9" to allow more room for mug placement and maybe also add a pastry.


Wednesday, May 14, 2014

Hexie Pillow

Remember that awesome ruler I posted about? The one used to make Hexagons. Well this was my first project done using hexagons. I made a pillow for Cara's reading corner. 

What you do is cut all the pieces with the hexie ruler, then sew them up in strips, then sew the strips together. I pressed the seams one way for a strip and the opposite way for the next strip, the all the strip seams towards one side. 

I quilted the pillow cover top following the hexagon shape in straight lines in side and outside the hexagon.


This is where it lives.

The cutest!


Wednesday, May 7, 2014

Eva Bebe

Well, I had one more baby girl to quilt for. I was so fascinated with the easy simple quilt tutorial I mentioned before here, that I decided on this quilt to be just that, it ended up being 42" by 42". I also added a name using the applique technique, since I was such an expert by then (sorry no picture, this was before the blog).

Add caption
I went all crazy on the Free Motion Quilting. Took a deep breath and started sewing spirals everywhere without a care. They idea is I have to just free motion quilt, go for it and hope to get better. We all know I am a beginner, so no surprises on the outcome. Overall I found it fun, and noticed some improvement towards the end. Four needles and three spools of thread later, here is a close-up of the FMQ design.


Tuesday, May 6, 2014

Christmas projects 2013

Projects before the blog.
I am trying to catch up on adding all the things I made before I started this blog. 

My Christmas tree needed a skirt and I needed a challenge. I was really excited to quilt a round project. It was quite a learning experience, especially learning that the binding fabric must be cut at a 45 degree angle to give it room to move. With this project I also discovered what that quilting guide was for! It allows you to follow your previous line when quilting. 
As always a new tool was needed to explore this new technique. I bought a 10 to cut each triangle, but that will be another post, meanwhile enjoy the beauty of my finished project.
Also, this was the first project I decided to give hand binding a try, and now I can't go back. I hand bind everything. It gives it such a better, more professional finish.

Christmas Tree Skirt


Table Runners / Mats

Since I had a lot of Christmas fabric left and I wanted to keep experimenting with round project I made two table runners/ table decoration mats. I wish I would have taken better pictures, but they are now in their new homes being loved. oh well! these will do. I made these for two of my mom's good friends who are special to me.


This I made like a Dresden flower on a wider scale.


Monday, April 21, 2014

Vania's quilt


Vania is the daughter of a  friend from my teen years. Look at that smile and those curls, how can I not be inspired to create something amazing for this little angel.
I made Vania's quilt last fall, using a free pattern given to me at my local quilt shop's monthly meeting.
The pattern is called mirror mirror designed by Georgette Dell'Orco. The pattern can be purchased at Cozy Quilt Shop. 
I used a fat quarter bundle of spring floral print and 1.5 yards of a white kona cotton solids for the backing.
The quilt top turned out beautiful! but there is much to be said about my attempts of free motion quilting.


Front

Back
FMQ

At the time I was experimenting not only with free motion quilting, but also learning about appliqué. I learned about Pellon Wonder-Under, a fusible interfacing that makes fabric fusible. Note to self, letters must be cut out in a mirror image, so when they are transferred they are correct. I did not notice this until my mother, the teacher at heart, called me out on my dyslexic mistake. oops!

How to appliqué letters

I first printed out the letters I needed in a 100 size font straight from word. Then, I traced them on the fusible interfacing sheet and cut them out. Once the letters where cut out I fused them to pieces of fabric on the wrong side using an iron. Finally I cut out the fabric to the shape of the fused letter and then fused it to the backing of my quilt. Once all letters where attached I gave it a finished look using the zig-zag stitch.


Thursday, April 3, 2014

Courthouse steps quilt

as a throw


Using all the layer cake fabrics I gathered on the quilt shop hop I decided to make a quilt. I had seen a tutorial on blue is bleu's blog that I really wanted to try. It seemed very neat and blew my mind trying to figure it out. Her tutorial is to make the hourglass steps pillow,  a two tone square and only the fabric in that square matches, but another great quilter I follow, Rachel Wooden Spoon,  made some adjustments and made it so it wasn't an hour glass block, but a courthouse step quilt. I just couldn't wrap my head around it, it took me several days to finally be brave enough to cut the fabric. I decided to make a paper version to guide me on sizes and quantity while cutting.

measurements and paper sample

Once it was all cut up and organized, the fun part began sewing it all on my new machine! my precious! Cutting took about 4 hours, and sewing up each block took about 20 - 25 mins per block depending on how tired I was and what distractions were around. Basting usually is quicker it may have taken a bit less than an hour, quilting took three hours and hand binding another three. For a grand fun total of approximately  20 hrs. It turned out beautiful! I love it!

Here it is with some ideas on uses.

as a couch decoration
as a picnic quilt


Baby quilt
A swaddled Kiko (this is my baby)

foot of the bed
as a foot warmer and decoration accent

wall decoration

It is up on my etsy shop if anyone is interested on purchasing it.


Monday, March 24, 2014

Weekend Projects

This weekend all I wanted to do was sew! I have many projects that need to be finished and so many new ones in my head that must get started. I thought I would just sew to my hearts content, but I forget how much prepping is involved before being able to sew, measuring cutting, ironing, interfacing...and of course a run to the quilt store. With all the prepping, the house wife duties of cooking, cleaning and multiple dog walks, I didn't accomplish as much as I wished for. Oh! but things were made. 

Take a peak. It is all lovely!

Duffle Bag. 

DONE!
Weeks ago I had posted the progress of this bag. I finished the handles over the weekend and now it is finally done and ready to be used (I just realized it needs a label). I really hope you understand the big deal handles are. It is a lot of work and my old machine did not make it easy on me. I love my new Juki! It is a true working horse.

I love pink and orange together!

Sew Pretty!

Handles!

Not a good picture at all, but what it's trying to say is that it is sewing through...
4 layers of fabric with interfacing,
raw edges folded, so 8 layers,
2 layers of fabric
1 layer of thick batting

Total 11 layers sewn like a breeze


Courthouse Steps Quilt

Making fast progress. I finished the quilt top and even got a chance to baste and quilt. It is now ready with the binding waiting to be sewn. 


Nephew number two

Nephew number two just had a birthday and I was planning to make him a quilt, when I found this in one of my boxes. I made this quilt top long ago, when nephew number one was a child and loved planets and space. I forgot about it and never finished it, now he is the cutest attempt of a teenager and this no longer fits his interests. Now he insists I make him a rockstar tablet cover. 
I basted and quilted this weekend. Dreading the binding. This is a bigger quilt. 


Cargo Duffle

I started making my own gym bag. It will be extremely lovely!!! It has pockets and it stiff and I am playing around with the idea of adding a yoga mat holder. If only the mail man would come with the fabrics I am missing. 
Cutting, labeling, and pockets were made. Went around all over San Diego in search for snap buttons, such a waste of precious possible sewing time. I am telling you I wish I could sew more! I can't get enough!

This that you see was 4 hours worth of work


This morning I added the snap buttons, it took 45 minutes! I just always chase projects with challenges to learn more, and to broaden my skills but I also frustrate myself because I am so excited about this gym bag I want to finish it NOW! I can't wait to sit and quilt and piece it together. Aside from learning to sew I am also learning patience.


You must be thinking, what is she talking about! She did a lot of work on one weekend. You should know I have a problem! I can't get enough!
Off I go. 

Happy sewing time :)