Thursday, February 27, 2014

Black & White Quilt

Let's make a quilt together.

I have chosen a simple pattern for demonstration purposes and because simplicity is beautiful.
I went ahead and made a sketch on Photoshop to be able to know how many squares I would be needing.

This quilt will be approximately 36" x 62".


What you will need:

  • Refer to my post about sewing supplies for the basics.
  • Two different color fabrics. I used Kona Cotton.
    • 1 1/2 yards of white
    • 1 yard of black
  • 2  yards of fabric for backing
  • 1/2 yrd for binding.
  • A bag of Warm and Natural Batting

Let's get started.

I went to Joann fabric store for the Kona cotton solids, with a coupon you get a good (scratch that, GREAT!) deal. I also picked up a bag of the awesome warm and natural batting. I went to my local quilt shop for the backing and binding fabric. They just have the best prints and color. Beautiful place, beautiful store, check it out here.

Fabric shopping


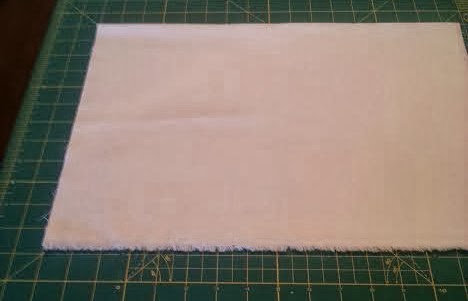
1. I placed the fabric as flat as possible on my cutting mat aligned to the markings on it. Then I cut off the uneven edge. From then on I only used the measurements on my ruler to cut 4" strips using a rotary cutter.


2. Once I had all of the strips I proceeded to cut them in 4" squares, using a square ruler.


3. Once I had cut all of my squares I laid them out to then be sewn in strip, ironing the seams split open.


4. Once I had my strips all sewn I then sewed two strips at a time. Then two double strips and so on until I had the finished top. I then again pressed the seams split open.


5. This is what I mean by ironing the seams split open.


6. Once the quilt top had been sewn it was time to do the basting. I laid down the layers beginning with the backing facing downward. Then the batting, making sure I left 4 inches of extra all around the edges. Finally, I placed down the quilt top. You can then either safety pin it all over or you can use quilt basting spray and spray it as you lay down each layer. I tend to do both. This way I reduce the amount of hole punctures into the beautiful quilt. 


7. The fun and exciting part. Quilting! I used a teal color thread to contrast and to bring color to this B&W quilt top.


8. After I was done quilting, time to do the binding. I apologize I got too excited to finish, I forgot to take pictures. I will soon post a tutorial on binding only.  So, while you work on making your quilt I'll be working on writing a binding tutorial.

Any-who, I hand stitched the binding to be able to make an invisible stitch and give it a nicer finish look.


HERE IT IS!

I LOVE IT!


This quilt is for sale at my Etsy shop in case anyone is interested in buying it rather then making it themselves.


Feel free to email me with any questions you may have, and please if you make a quilt...share!

In case anyone is wondering, this took me:
  1.  12 hours of cutting and sewing the quilt top.
  2. 2 hours of basting.
  3. 5 hours of quilting.
  4. 4 hours of cutting, ironing, and hand stitching the binding.
TOTAL = approximately 23 hours.


Happy sewing!

Tuesday, February 25, 2014

sewing supplies

Now I'll share with you my list of basic sewing and quilting supplies I own.


  • Olfa self healing cutting mat


  • Rulers


I have different sizes and shapes, but you can survive with just the long rectangular one.

  • Scissors 

I have paper scissors, fabric scissors, fabric pinking scissors, and a pair of tiny ones. They are all Fiskars.


  • Rotary cutter 

It also is Fiskars brand along with the replacement blades.

  • Pins

Buy flat pins, I do not recommend these ones with the round end.

  • Iron


My iron is Black and Decker, but any iron will work. I iron my pieces on a wool setting or for some irons #5. It is very important to know you DO NOT ADD WATER! Water will stretch your fabric and make it uneven and hard to match the pieces together. You can either prewash the fabric or wash your finished product.
  • Ironing board
  • Sewing machine
  • Thread

I use all kinds of thread from cheap to expensive only because I do not care much about this sewing machine and I sew on a budget. Cheap thread frays and leave a lot of lint residue everywhere which can break your machine. I recommend Coats & Clark, or Gutterman.

  • Needles #14 for sewing and #11 for quilting


  • Fabric
  • 1/4 inch presser foot

  • Seam ripper 

  • Safety pins


  • Quilt basting spray


This is a good place to stop or this list will never end. Ready to sew along?

Happy sewing


Monday, February 24, 2014

sewing machine needles


A few days ago, on my drive back home; I was thinking of my latest project and how to quilt it. I am in the process of sewing a table runner, but have set the project aside until I make a decision. I anxiously want to practice free motion quilting, but my sewing machine is not suited for it. I kept tossing the idea back and forth, a simple stitch in the ditch quilting pattern or should I just go for it and try the free motion quilting and risk having a badly quilted table runner? I did end up deciding on a simple straight line stitch in the ditch pattern (which is sewing in the gap between fabrics).

My version of free motion quilting
See! Not good.


What came to mind while reviewing all these thoughts in that long drive was that I may be using the wrong needle. Maybe that's why I am not able to explore free motion quilting as much as I would like to. It was an aha! moment. When researching it I found out I was right; it is most likely my sewing machine, but also I could use a more appropriate needle. This gave me the idea to post what I have learned about needles on the length of this sewing journey. Which is not a lot, but is plenty of knowledge I wish I had a few months ago.

  • You must change the needle around every 8 hours of sewing. Even if you think it's still good, and it hasn't broken or bent.
  • Needles sizes vary. The larger the size the stronger the needle, but the thicker the holes will be if used on the wrong kind of fabric.
  • Universal (to sew everything) needles are 90/14 (European #  / American #). The order in which the numbers are presented is not important
  • Quilting needles are 75/11 (round point and thinner needle).
  • The universal needle 90/14 could be used for quilting, it will just leave a bit of a bigger hole than the quilting needle. It is not wrong to use either.
  • I use 110 /18 for top stitching or when sewing through way beyond too many layers of fabric.
**There is  a lot more to needles, but this is all I ever use. I am sharing what I know and what I use for my projects.


Tuesday, February 18, 2014

How to thread a sewing machine

In order to be able to sew using your sewing machine you must run the thread through the machine. We learned on my previous post that the bobbin provides the thread for the bottom stitch. The spool of thread provides the thread needed for the top stitch.

These are the steps I personally follow when setting my machine ready to sew.

Once we have wound our bobbin, place it into the bobbin case. If you do not know how to wind the bobbin go to my tutorial  here.

bobbin inside the bobbin case and ready 
to be inserted into the shuttle assembly
This is where we left off on my previous tutorial.


Let's begin by setting the bobbin into place, just to get it out of your way.

Insert the bobbin case with the bobbin inside it 
into the shuttle assembly.

Make sure the hole in the bobbin and bobbin case 
go rightinto the shaft on the shuttle assembly.
Also, make sure the handle aligns with the groove.

Press until you hear it click.

You are done with this part!


Once you have completed the bobbin part, let's move on to threading the top thread.

Place the spool of thread on the spool holder and secure it with the attachment.


1. First, run the thread through the top thread guide.
2. Then run the thread through the tension disc.

Pull the thread through the thinner groove to the right in 
the direction indicated by the arrows.
Pull the thread around the round thing at the bottom.
Pull the thread up through the larger groove on the left,
 again following the arrows.

Loop the thread up and around the metal bar 
at the top of the larger groove.

Pull the thread down and feed it through the bottom thread guide, as shown above.

Thread the needle from the front.

Pass the thread below the presser foot, 
pulling about 4 inches of thread through. 
You are all done with the top thread!


Now pull the bottom thread from the bobbin to the needle plate.


While pulling on the top thread with your left hand, with your right hand turn the wheel clockwise to move the needle all the way down. Keep turning the wheel and bring the needle back up. When the needle moves up again, it brings the bottom 
thread with it.


See how the two threads are intertwined


Pull the threads so they are both on the needle plate. Leave at least 4 inches of thread free.


DONE! You are ready to sew!


Monday, February 17, 2014

What I'm Working On

Just a little preview of my carry-on duffel bag. #travehandmade


out side in

Needs handles and pockets. 
I'll try to add them even though it will be hard 
now that it is put together.


inside